rFactor 2 Car Paint Editor
Article #1 in a 4-part series.
- 1 - this article
- 2 - Team Cars for rFactor 2
- 3 - rFactor 2 Car Paint with Colored Chrome
- 4 - rFactor 2 Paint 2013 Nissan GT500
Studio 397 recently added a guide on painting a car for rFactor 2 using their new material system as announced on their “Roadmap Update January 2019” post. Cars come with templates to help create colored region masks to designate materials using the car paint editor. Basically, create two image files: one for the regular skin and another for the region map. The editor provides immediate feedback within the game for changing body color and materials. As of today only the official DLC GT3 and GTE cars exteriors are supported. Future updates will add materials to the car interiors and tracks. Also, the developers continue to work on their new interface for rFactor 2 based on HTML. Currently access the paint editor using a web browser, and my assumption is the new interface will include the editor.
Requirements:
- a paint editor with support for layers such as Photoshop or Gimp 2
- understanding layers: create, sort, hide/show
- how select areas and create a layer mask
Tips:
- look over the default images for the original car and compare to 3D car in game to learn the parts
- sort region layers with decals on top and main body paint on bottom
- duplicate region and hide layer to experiment
- keep original decals on individual hidden layers for editing then copy-merge into a single layer for easy access and mask creation
See the guide: “How to paint a car with the new material system” located on docs.studio-397.com.
The guide describes shortcuts specific to Photoshop, but new Gimp users should have no trouble finding the equivalent processes from the Gimp guide or many online tutorials. If you have never worked with masks before, it may be helpful to review a quick tutorial.
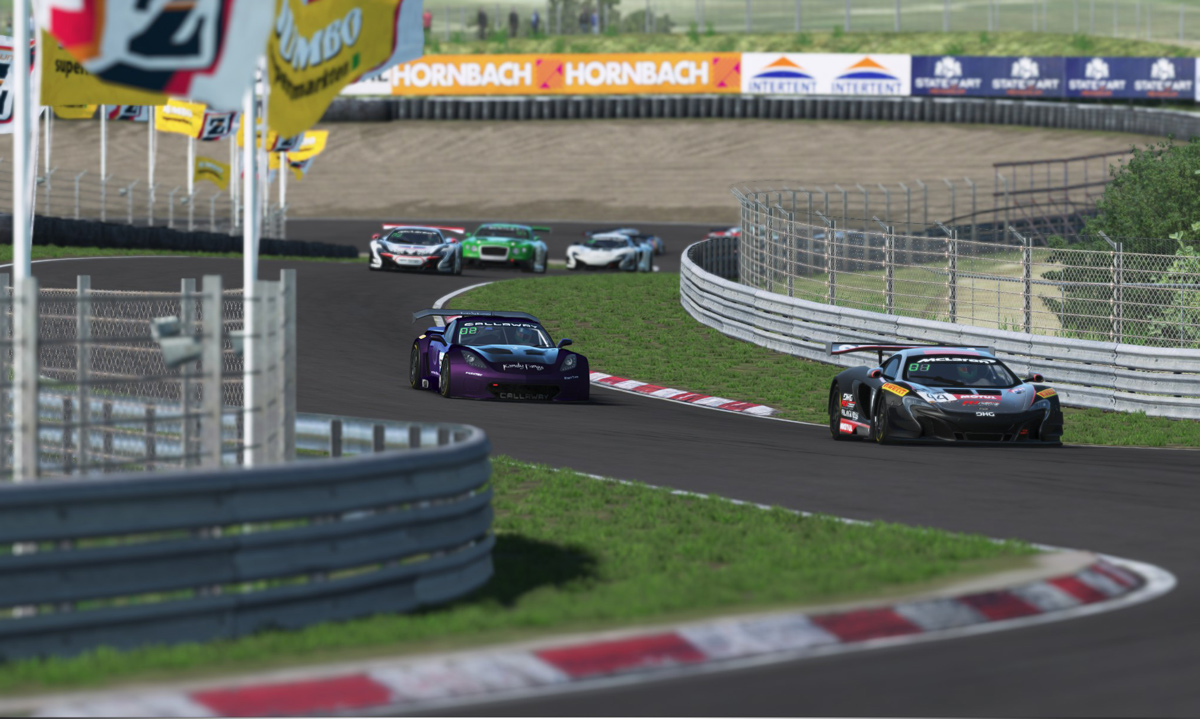
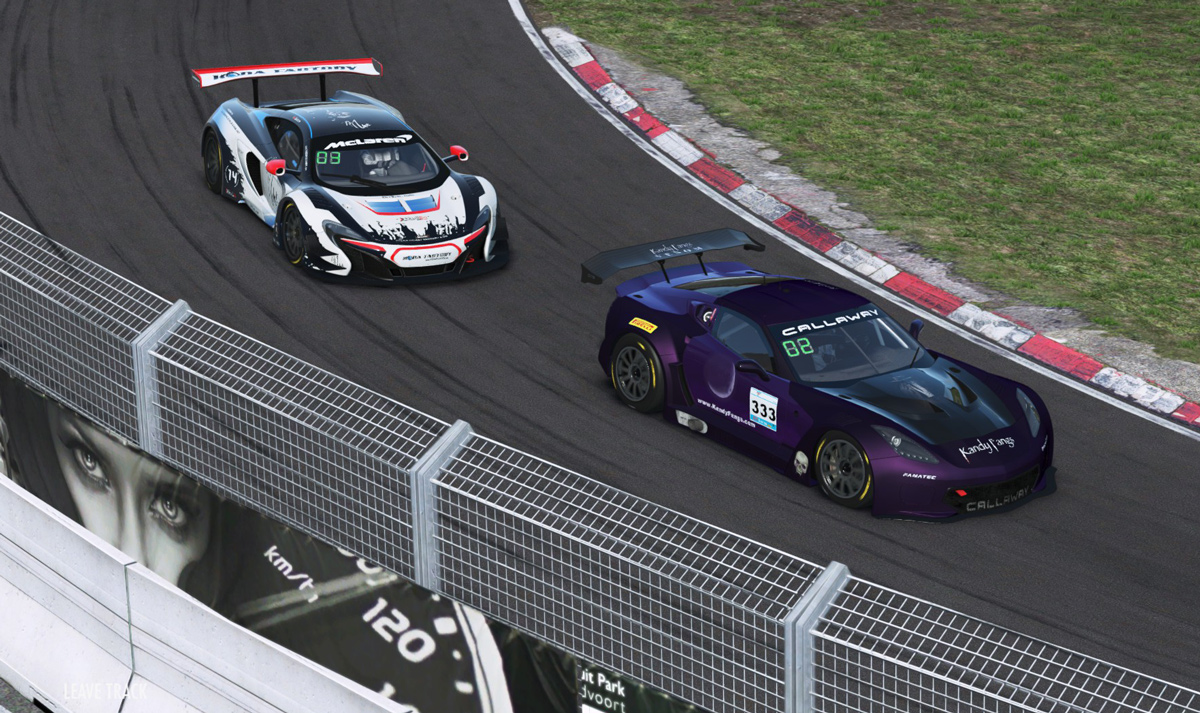
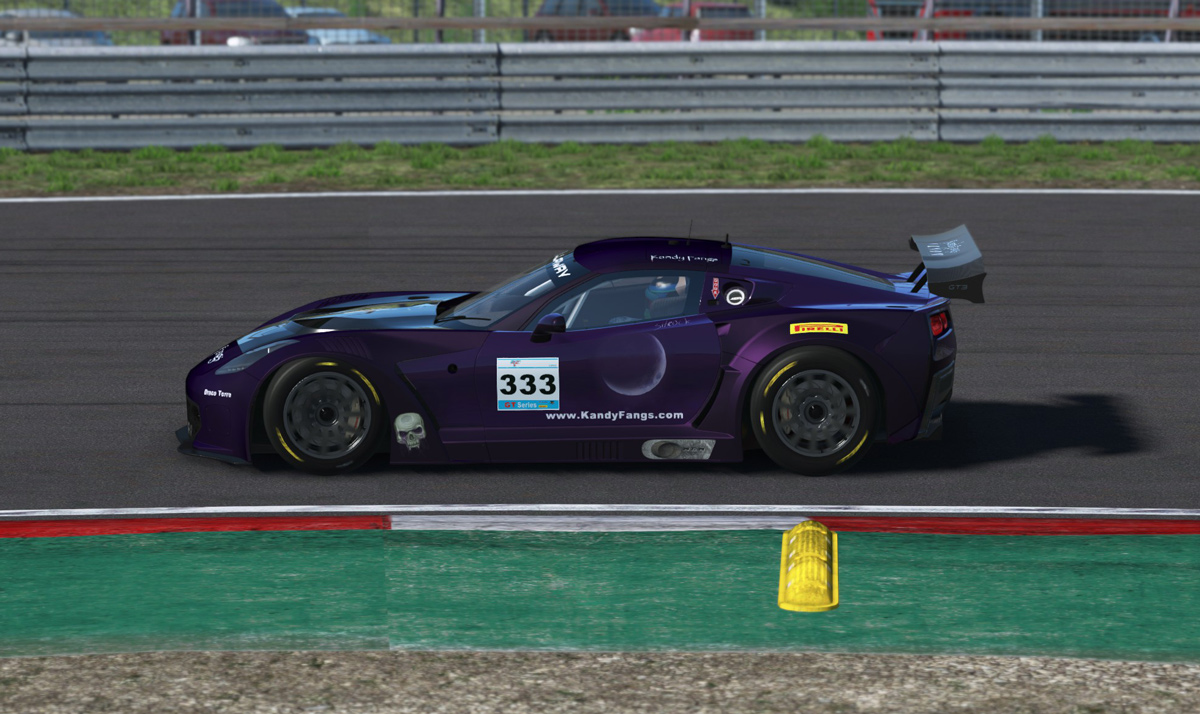
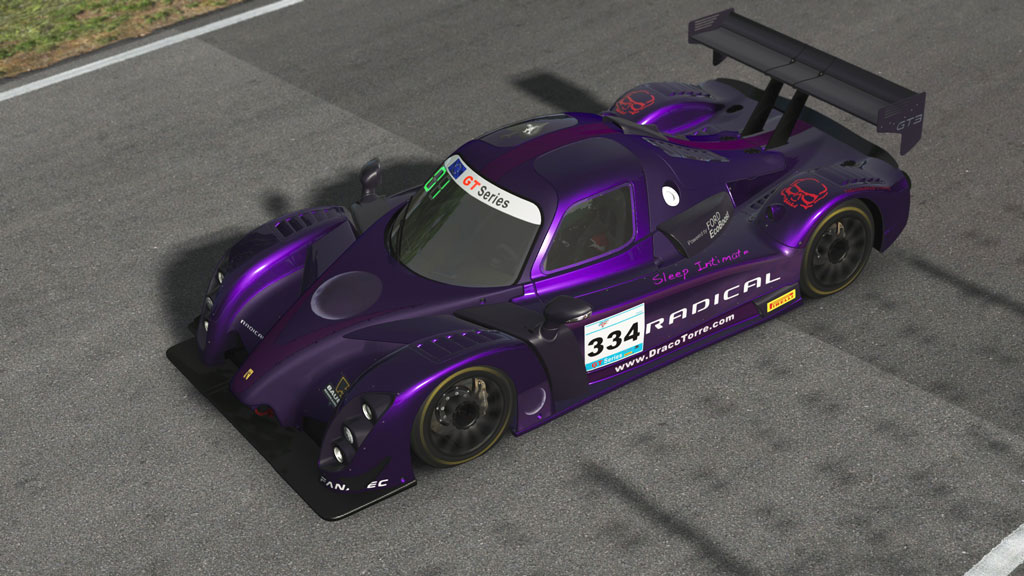
This is my first attempt at painting car livery, so I stick to the basics using artwork I’ve previously created and sponsor logos found within the title. I created a number plate, because I wanted something different and include the rFactor 2 logo so viewers can quickly identify which racing simulator the image comes from. I found the guide informative and easy enough to follow, and after loading my first attempt into the paint editor the region mapping became quite clear. I painted two cars based on a theme: my websites DracoTorre.com (this site) and KandyFangs.com. I chose the cars, Callaway Corvette C7 GT3 and Radical RXC GT3, for their interesting looks and I want to drive them.
The Photoshop template files come with the cars found within folder, rFactor2\Templates. For the Corvette that is rFactor2\Templates\Callaway_Corvette_GT3_Car.psd. As shown below, the template includes a wireframe to help identify the parts of the car. Remember to hide the wireframe layer before exporting images.
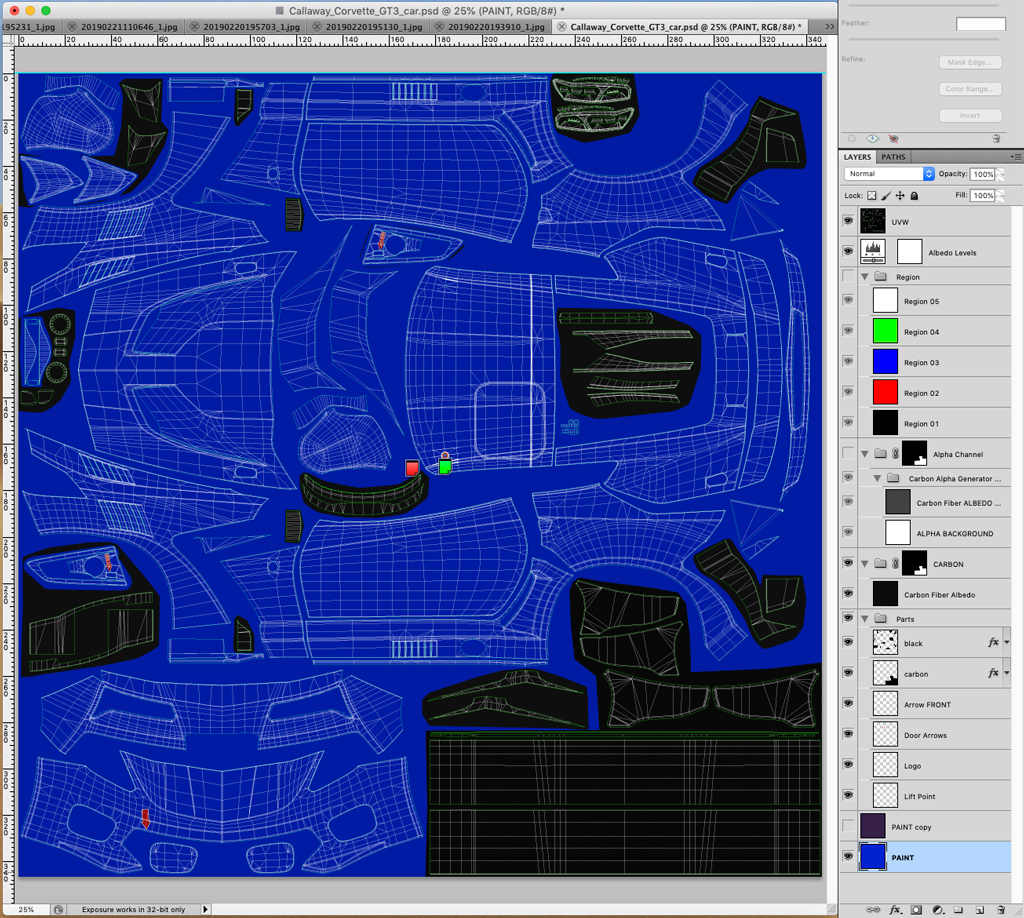
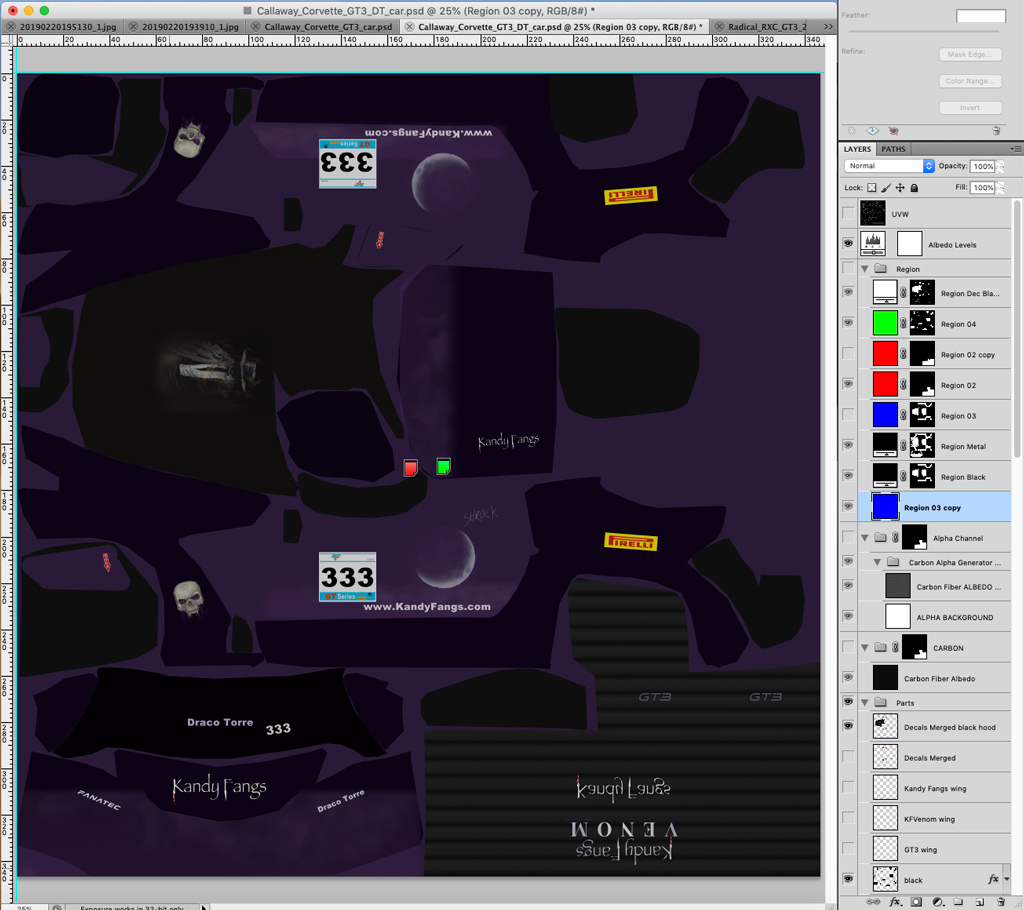
Here is how my painted car appears in Photoshop:
The car on the track:
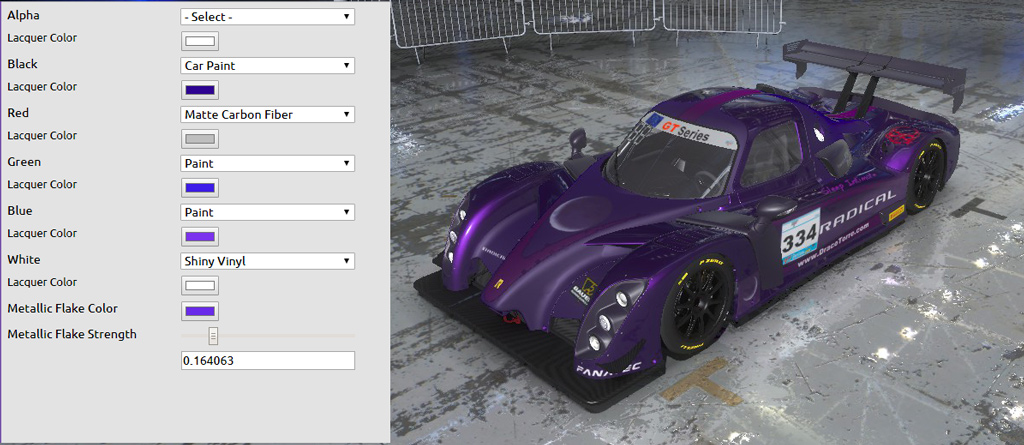
As noted in the guide, the region map uses color coding to match the region layers with the paint editor. The base paint does not need to be black, but I found black must be the region for metallic flakes. For my Corvette I decided the primary color would be basic color with sections of the car having metallic flakes, so I set my car paint region to blue and secondary region to black. For the Radical I wanted mostly metallic so as in the guide its car paint set to black. Whichever region used for main car paint, sort that region layer last since no mask is required.
Region color mapping:
- Black = paint color with colored metallic flakes (may be main car paint or secondary paint)
- Red = carbon fiber (or whatever if no carbon)
- Green = secondary color, tertiary color, chrome, or whatever
- Blue = secondary color, tertiary color, chrome, or whatever
- White = vinyl decals (shiny or matte)
For the Corvette I set the main body color to blue region and sorted the layer last. This will be for violet paint. Black for the sides and roof having red-purple mettalic flakes over dark violet paint. The hood I wanted all black with a painted image. I found it best to use shiny vinyl decal as matte vinyl appeared brighter causing the artwork to stand out instead of blend in. So, the hood is entirely white even though the decal only takes up a rectangle within the top-center.
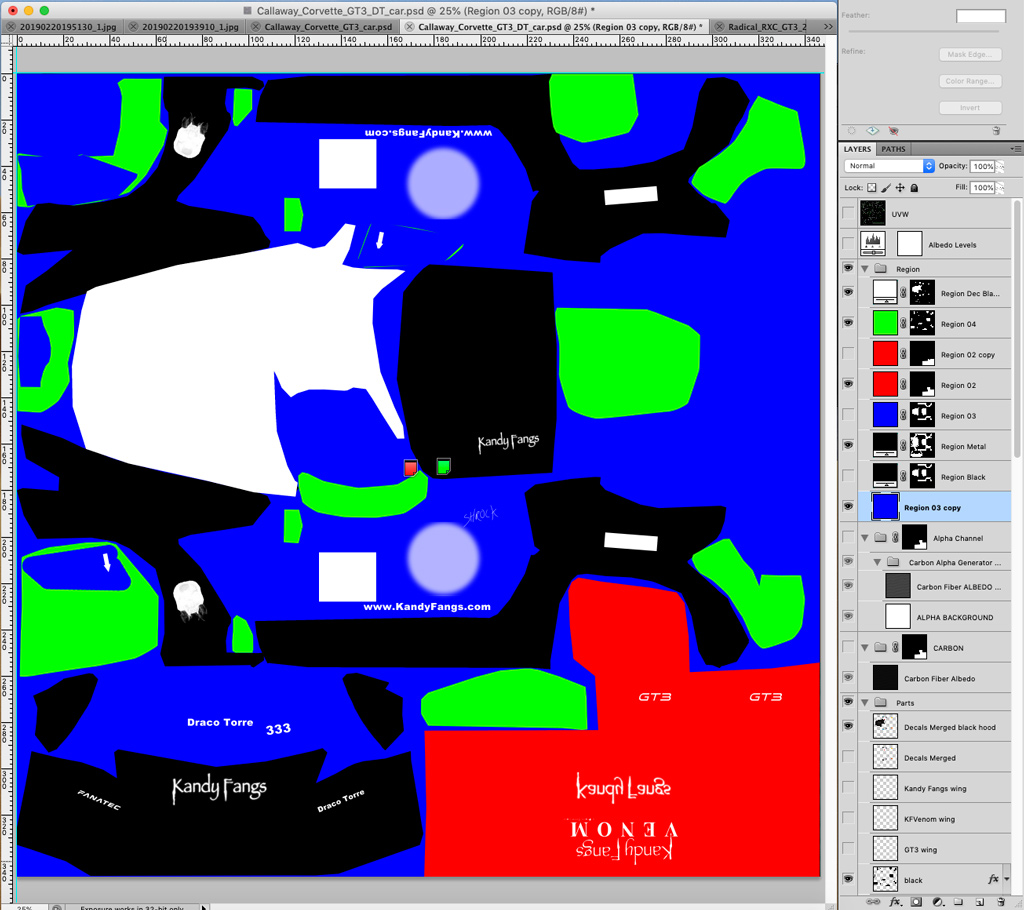
region map for C7 - note the order of layers
Export the two DDS images with DXT5 and include mipmaps. Copy these into the folder created from the showroom as described within the guide. If first selecting color in the paint editor causes an error to display, reload the car. The image below shows the paint editor with my selected colors assigned by region and the car within the showroom.

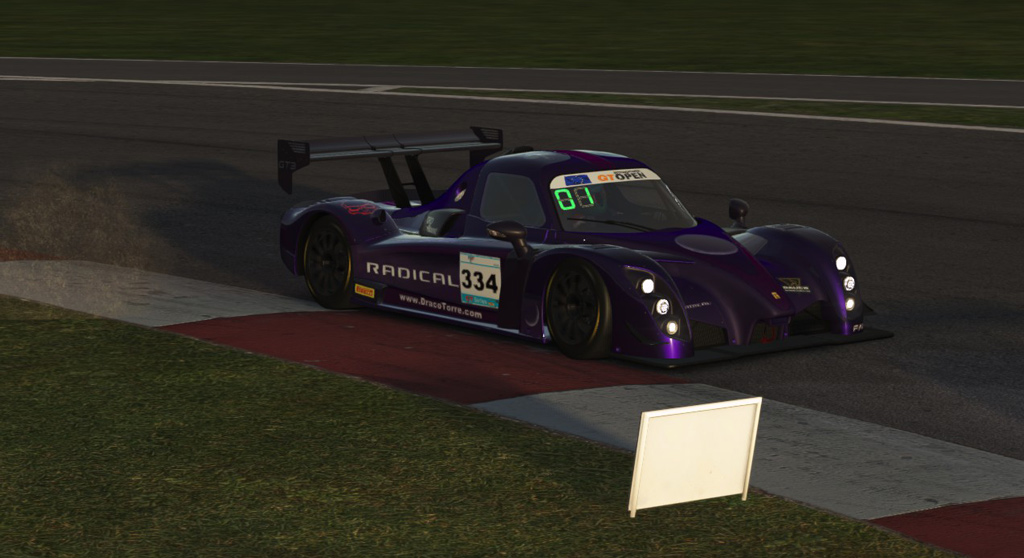
For my Radical I decided to customize the sun screen, but discovered the custom sunstrip only displays in the showroom. On the track the original strip appears on the car. (update 26 February): Radical RXC 2.41 car update resolves this issue. The sunstrip filename ending in ‘EXTRA1’ now works in the game.
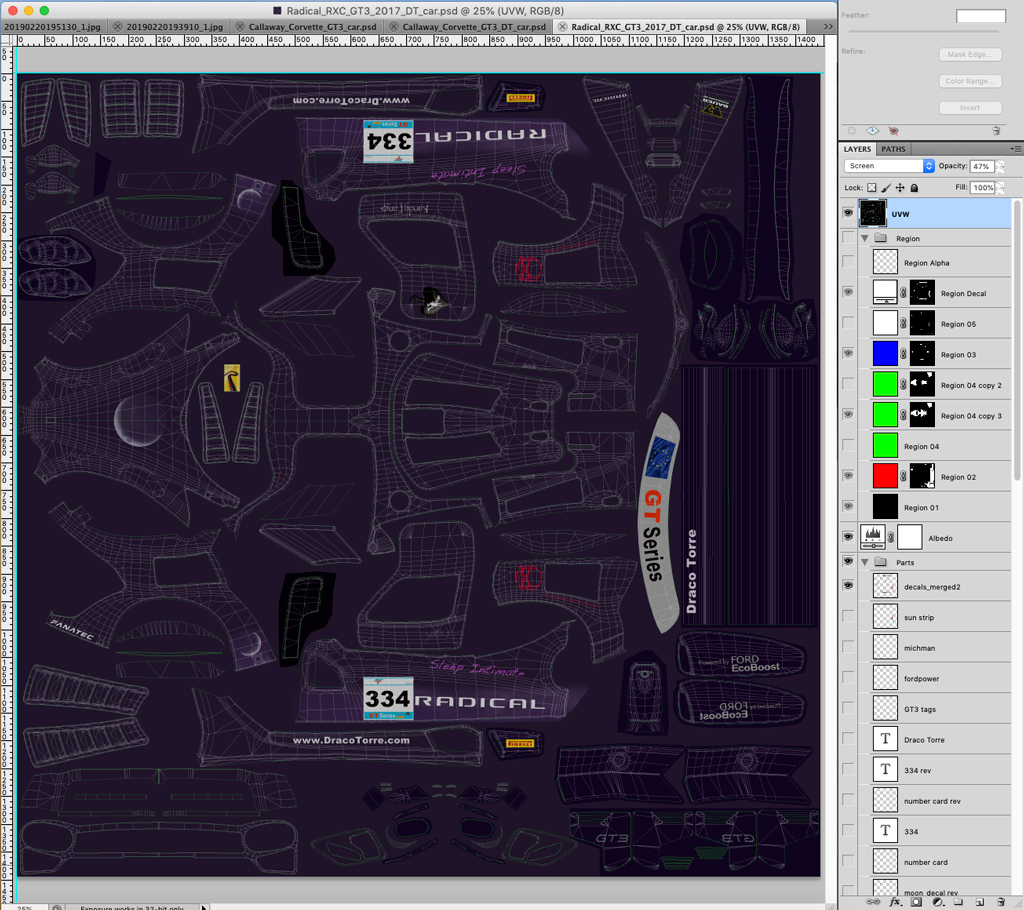
Radical RXC GT3 paint with wireframe (remember to hide before export)
_above: Radical in showroom has custom sun screen - below: on track with custom window
I found creating custom car skins with materials for rFactor 2 reasonably easy thanks to the car paint guide and in-game paint interface. The trickiest part might be figuring out which areas of the exploded wireframe belong to which parts of the car. Review original images of existing car, or try painting an area in a test color then view in showroom to discover the position on 3D car. Now that I have the hang of it, I may consider painting more serious racing themes in the future.