How-To: Make a 3D Photo

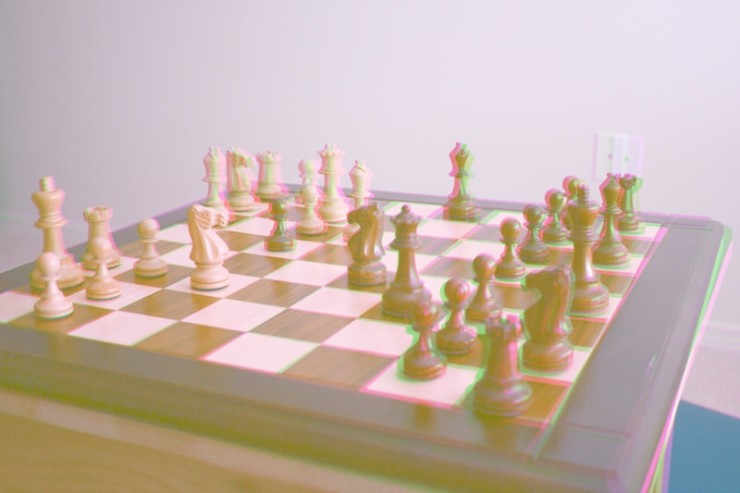
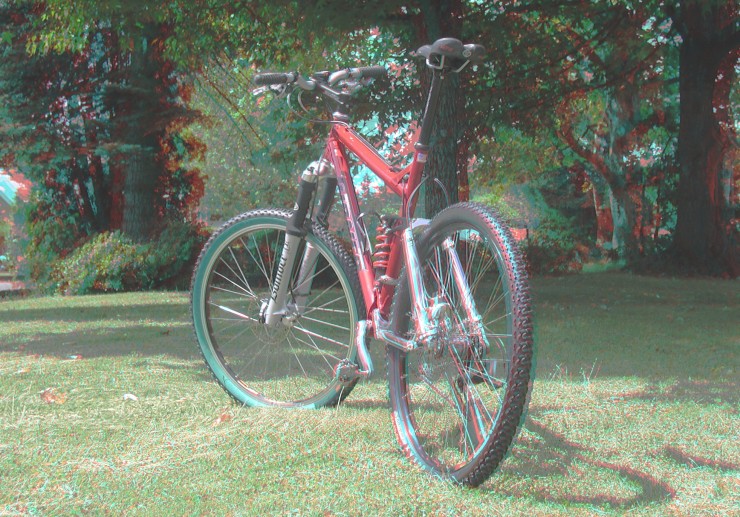
The above chess picture is a left/right merging for magenta/green 3D glasses. Below is a bike for red/cyan glasses.

Use Magenta/Green 3D glasses to view the chess photograph or Red/Cyan 3D glasses to view the bike photograph. Click on an image for a larger view. 3D quality depends on your monitor’s color settings. The chess photo ghosts a little on my Macbook screen, but appears perfect on an external LCD.
Items list
- Digital camera
- Tripod for digital camera
- Photo software supporting layers such as Photoshop or Gimp
- An interesting subject for 3D
- Red/Cyan or Green/Magenta 3D glasses.
You can find 3D glasses with home movies such as Coraline, with activity books for children, or make your own by purchasing supplies at an art store. Gimp is available for free, which the instructions here will follow. Software that tries to do the modifications for you exist, but doing it yourself allows greater control over the results.
The Science: How do 3D glasses work?
Each lens has different complimentary colors acting as a filter for each eye. Colors are complimentary when the combined color is neutral such as red and cyan. Two photos taken from slightly different vantage points (like your eyes) aimed at the same point are colorized opposite of the respective colored lens. For example, my green/magenta glasses has green over the left eye so the photo taken on the right side needs to be colorized green. The green lens filters out the green portions of the image so the left eye does not see the right vantage point. You could also put the two photos side-by-side, left image on the right, and cross your eyes. The 3D glasses make it easier looking at a single combined image. Other 3D glasses technology includes shutter glasses viewing flashing images and scanning glasses for viewing images stacked in narrow lines. All work on the same principle, one lens blocks what the other eye should see. The rest is depth perception.
Step 1: Take two photographs
Mount the camera on the tripod and take a picture of your immobile subject. If outside, make sure the wind is not blowing the leaves around. Keep track of the position and the aim using the lens guides. If your lens has a center marker, note its exact position. When planning the shot, you might choose to aim at some distinguishing mark on your subject. In the chess image, I aimed my center mark at the groove in the dark knight at the center. Note this photograph as the right image (or left if you find it easier to move right.)
The distance you move the camera depends on how far away your subject is and the size of your lens. Move too much and the subject may pop out, the subject appears nearly 2D floating above a 2D background, or the image may become disorienting. For my chess picture, I used an 18-55mm lens positioned about four feet away, and I moved the camera about a half of an inch. For the bicycle, positioned thirty feet away, I moved two inches. The bicycle appears to pop out a little, so a smaller distance might have been better. Move the camera, perpendicular to the subject, and aim for the same position on your subject. Take the photograph and note it is the opposite eye to the first.
Step 2: Load the two pictures into photo editing software
Load both photographs. Select the entire image of one photograph, copy, and paste into a new layer in the other image. Label the layers according to the eye (left or right.)
Step 3: Modify the images
The goal is to colorize each image the opposite of your lenses. For Green/Magenta 3D glasses with green over the left eye, colorize the right image green by editing the color balance for all ranges (shadows, mid-tones, highlights.) There are two methods to colorize, one by adjusting the color balance and the other by editing the color channels. Try both and see which works best.
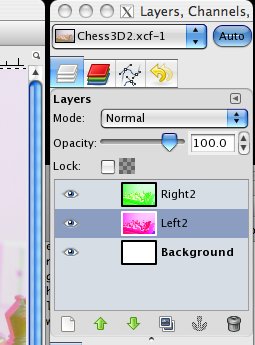
Colorize by adjusting color blance: In Gimp, find the color balance window under Colors on the menubar. Uncheck Preserve Luminosity checkbox. Move the Magenta-Green slider all the way to the Green for each of the three ranges. Do the same process to the image labeled, right, but move the slider all the way to the magenta. You should have two images appearing similar to the green and magenta images in the layers image below.
Colorize by editing color channels: Some software forces global color channels for all layers requiring a screenshot and paste into a new project file. Software that allows independent layer channel editing allows edits within a single file.

For Red/Cyan glasses, turn off the blue and green channels for the red image and turn off only the red channel for the cyan image. Take screenshots of each and paste into layers of a new image.
Now adjust the opacity of the top layer to 50%. This allows you to see through to the lower image. In Gimp, find the opacity slider control in the Layers window as seen in the screenshot at right. For brighter results, you may adjust both layers to 50% with a white background. Notice the colors of the individual layers. Try looking at the layers panel with your 3D glasses, closing one eye at a time. The green image should be nearly invisible peering through the green lens and closer to normal color peering through the magenta lens.
If you see ghosting, you may need to adjust the colors. Try both colorizing methods to see which works best for you.
Step 4: Save output
You may want to save the project in the default format for editing. Try your 3D glasses to find any problems. To share with others on the web, export the picture to JPG keeping the quality as high as possible. Too low quality (too much compression) will degrade the 3D appearance. For an uncompressed image, save in TGA format.
Put on your 3D glasses and enjoy. Share your 3D images on Flickr, Twitpic, or on your own page.